English
A drywall access panel is a removable or hinged door installed flush into a gypsum board wall or ceiling, providing a serviceable opening to reach plumbing shutoffs, electrical junction boxes, HVAC dampers, or structural components without cutting through finished drywall each time. Choosing the right panel type and installing it correctly the first time saves hours of repair labor and prevents costly drywall damage on every future service call.
According to industry estimates, a poorly placed or wrong-size access panel adds an average of 2–4 hours of remediation work per service visit. This guide covers every major panel category, critical sizing and framing rules, and a complete installation walkthrough so contractors and DIYers can get it right once.
Understanding which panel type fits your project is the single most important decision. The wrong choice leads to gaps, rattling, code failures, or panels that simply cannot be opened in tight spaces.
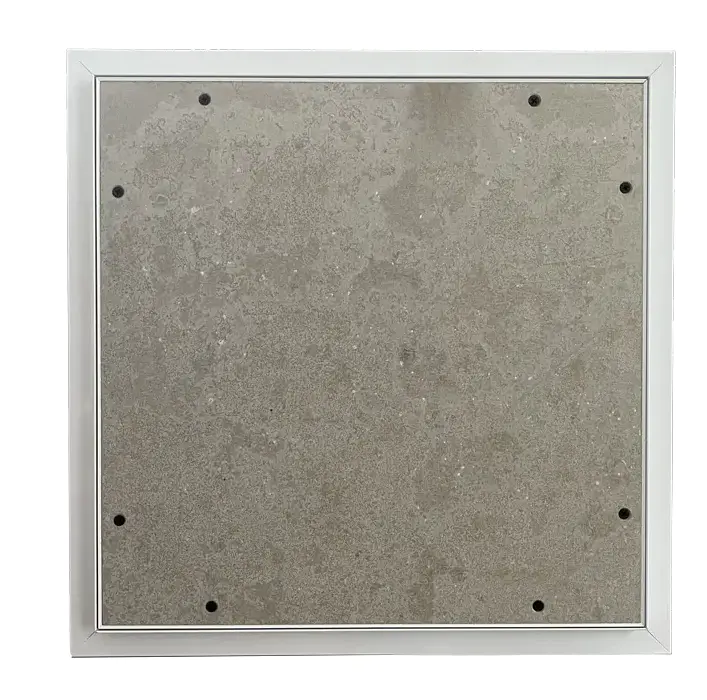
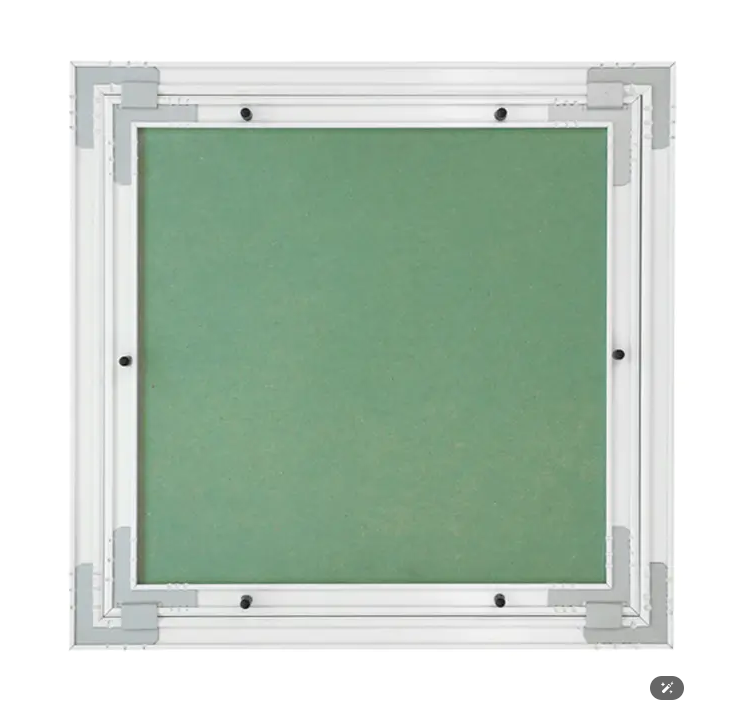
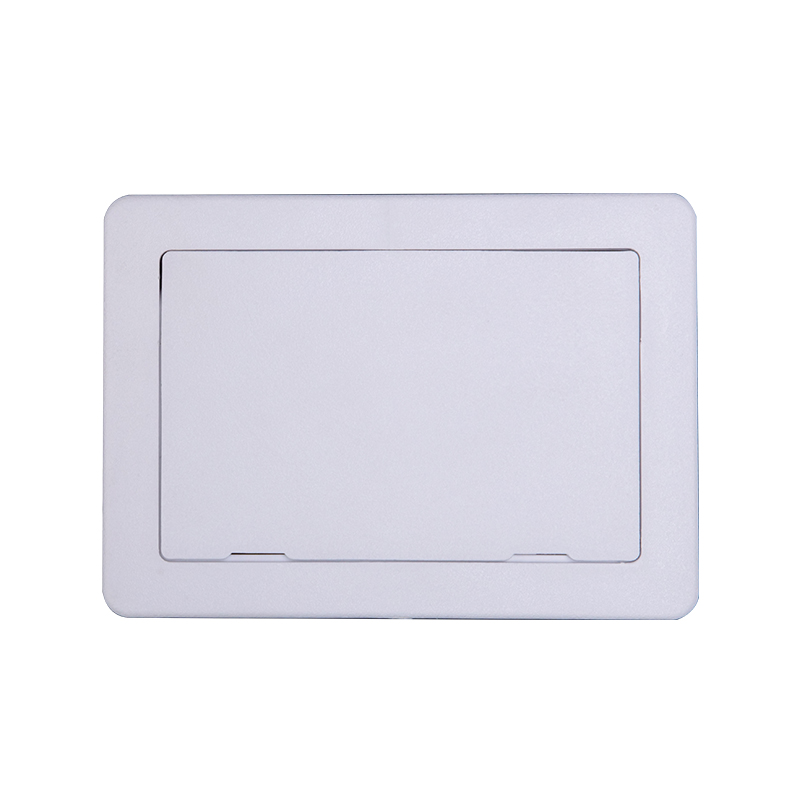
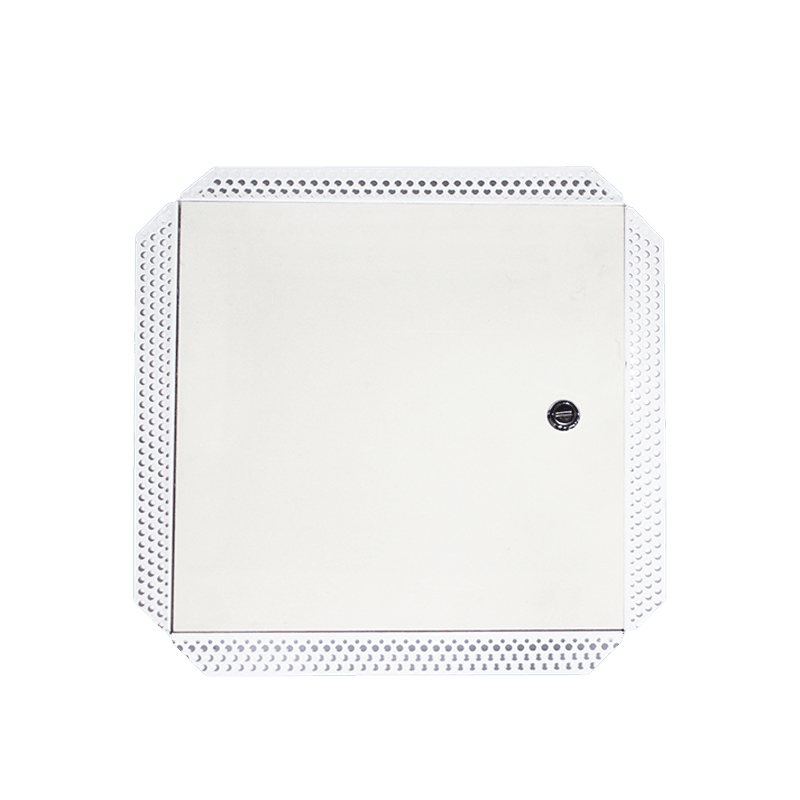
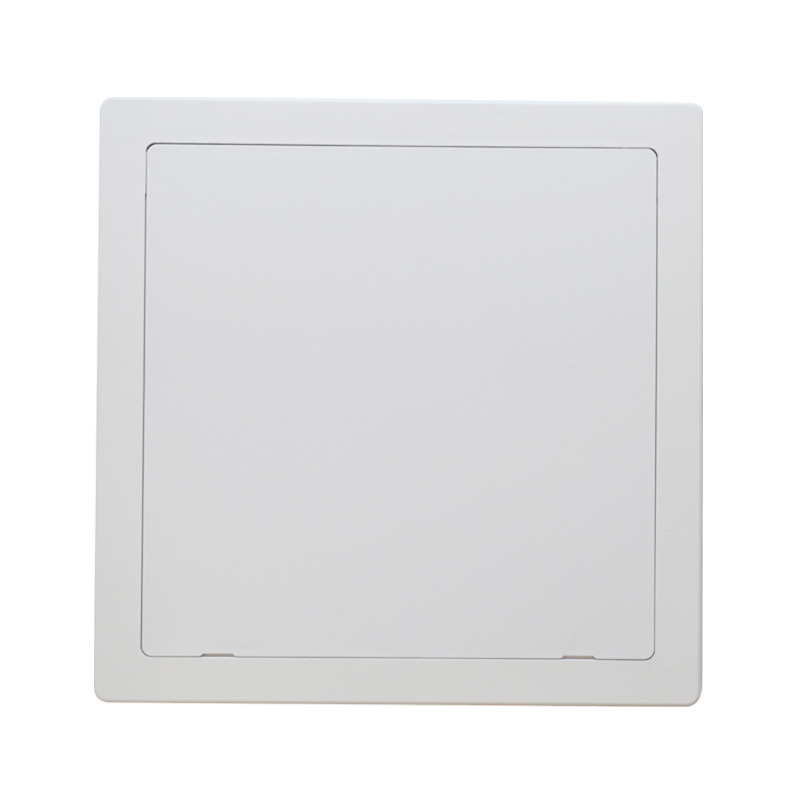
These are the most common residential panels. A metal or plastic frame with a drywall bead flange is set into a framed rough opening, and the door itself accepts a drywall inlay so the panel blends seamlessly into the surrounding wall. Typical sizes range from 6×6 inches up to 24×24 inches. They are best suited for walls and ceilings that are painted after installation, producing a near-invisible finish.
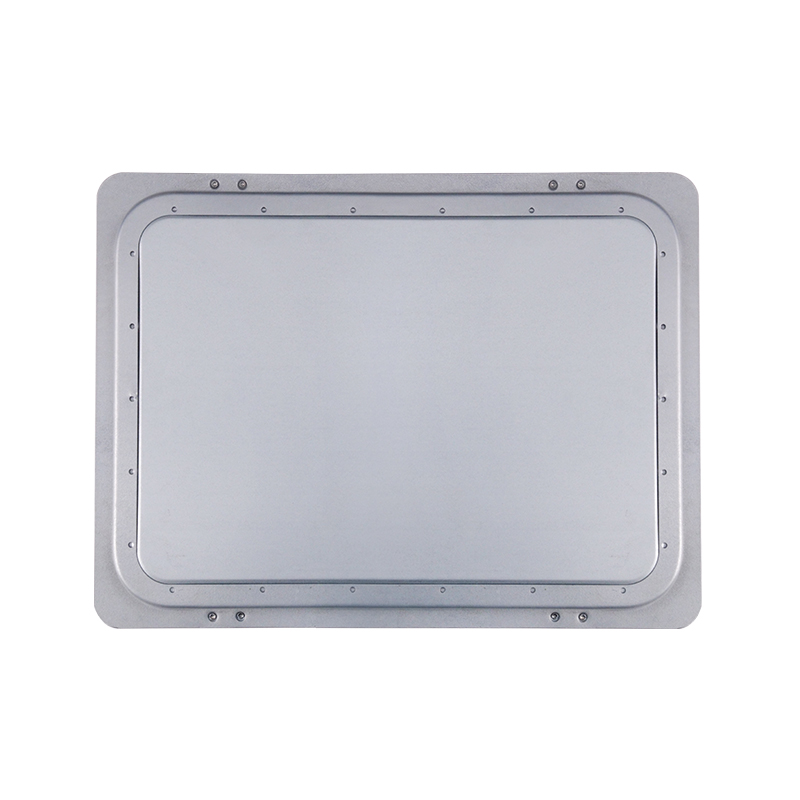
Flush panels have a solid metal or plastic door that sits exactly level with the wall surface. A quarter-turn screwdriver latch holds the door closed. These are common in commercial buildings, utility rooms, and mechanical spaces where an invisible finish is less important than quick, tool-accessible entry. Standard commercial sizes include 12×12, 14×14, and 16×16 inches, though custom sizes are widely available.
Required by code whenever an access opening penetrates a fire-rated wall or ceiling assembly—for example, a 1-hour or 2-hour rated corridor wall in a multifamily building or commercial structure. These panels carry a UL listing (such as UL 10B or UL 10C) and typically use 20-gauge or heavier steel construction with intumescent seals. Using a non-rated panel in a fire-rated assembly is a code violation that can result in failed inspections and liability exposure.
Used in exterior walls, attic hatches, and crawl space ceilings where thermal performance matters. An insulated core (commonly rigid polyisocyanurate or EPS foam) is bonded to the door panel. Quality insulated panels achieve R-values between R-10 and R-20, helping maintain building envelope integrity. Look for panels with a continuous gasket seal around the perimeter to prevent air infiltration.
Designed for veneer plaster or skim-coat finishes rather than taped drywall. The frame has a wider return leg that acts as a plaster screed. After plastering, only a fine hairline reveals the panel perimeter. These are the correct choice for historic renovation projects that use wet plaster systems.
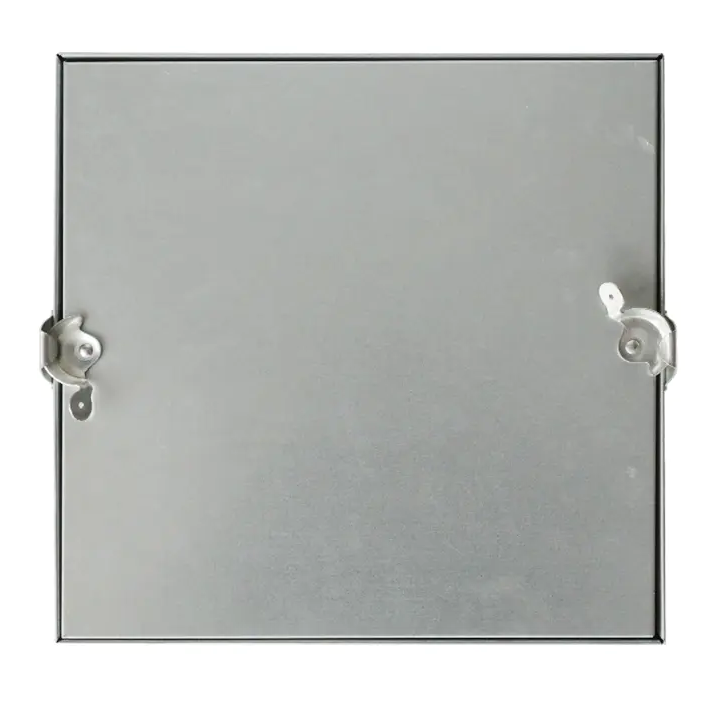
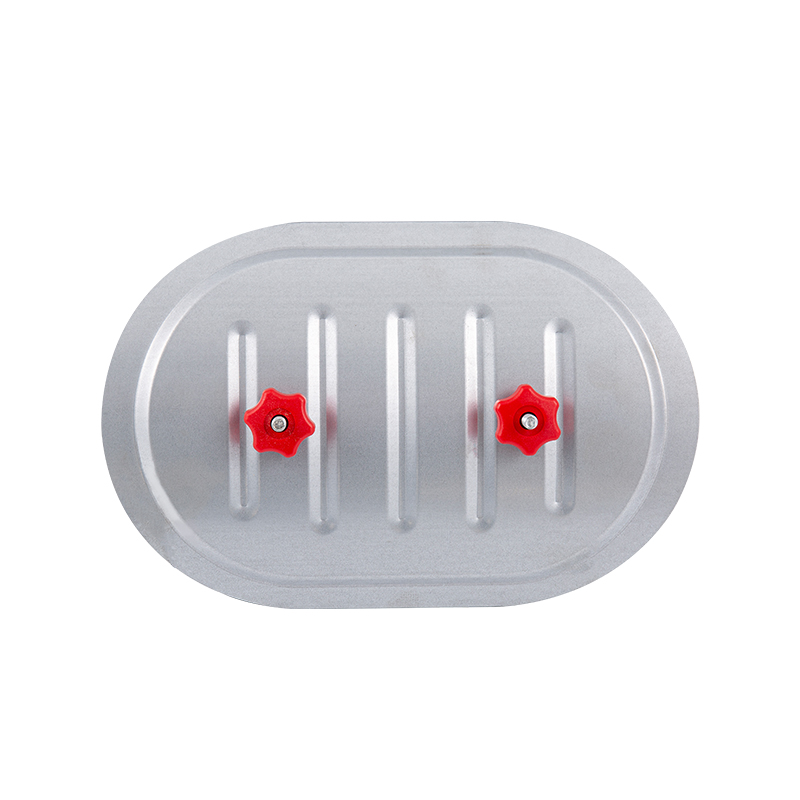
In some applications—particularly above drop ceilings or in mechanical chases—a completely removable panel with no hinge is preferable. These panels clip or friction-fit into a frame and can be lifted out entirely, allowing large equipment or pipes to be passed through the opening. They are common in industrial and hospitality construction.
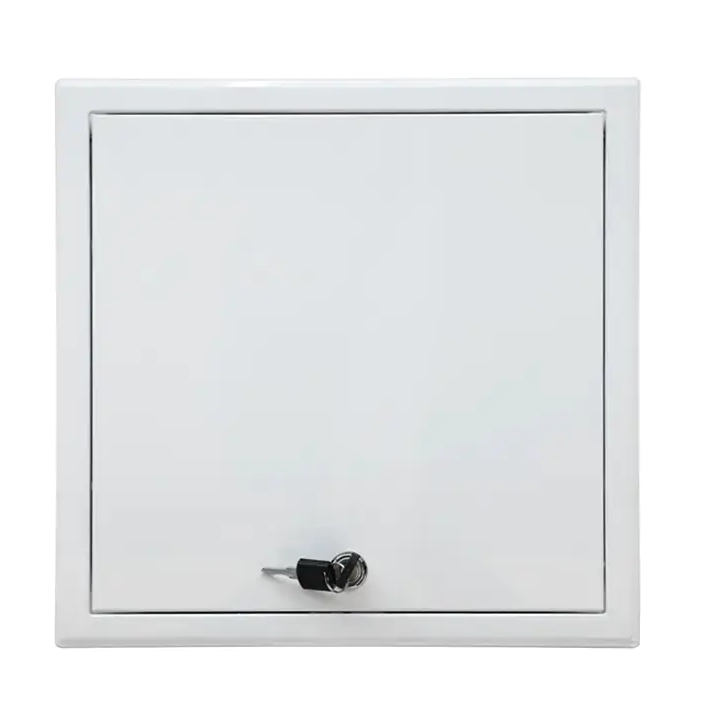
For panels in public-access areas containing electrical panels, gas shutoffs, or sensitive controls, a key-lock cylinder or padlock hasp is integrated into the door. Most building codes require locking panels for electrical enclosures accessible to the public. Cylinder lock options include standard keyed or Best/Falcon interchangeable cores for master-key systems.
Correct rough opening size and solid framing are non-negotiable. A panel that sits in undersized or out-of-square framing will never close flat or seal properly.
The access opening must be large enough for a person's arm—or ideally a person's upper body—to reach the deepest serviceable component. As a practical rule:
Always verify local code amendments, as some jurisdictions require larger minimum dimensions.
The rough opening must be framed with doubled headers and sill plates if it falls between two studs, or with cripple studs and blocking if it interrupts a single stud bay. The rough opening should be ¼ inch to ½ inch larger than the panel's listed rough opening dimension on each side to allow for level and plumb adjustment. Use a level and square on every framing member—a panel frame installed out of plumb by even 1/8 inch will bind on closing.
Standard 16-inch on-center framing accommodates panels up to 14 inches wide without additional framing. For 24-inch on-center framing, panels up to 22 inches wide fit in a single bay. Any panel wider than a single bay requires doubled framing members on each side to maintain wall structural integrity.
Gathering everything before starting prevents mid-job trips to the hardware store and keeps the work moving efficiently.
| Category | Item | Notes |
|---|---|---|
| Cutting tools | Oscillating multi-tool or drywall jab saw | Oscillating tool gives cleaner cuts near framing |
| Measuring | Tape measure, framing square, level | 4-foot level for wall panels; torpedo level for ceiling |
| Fastening | Drywall screws (1-5/8" for ½" drywall), drill/driver | Use fine-thread screws for metal framing |
| Finishing | Joint compound, mesh tape, corner bead | For bead-flange panels only |
| Safety | Safety glasses, dust mask (N95), gloves | Required when cutting gypsum |
| Panel hardware | Access panel (correct type and size) | Verify UL listing if fire-rated wall |
Follow these steps in sequence. Skipping ahead—especially on layout and framing—is the leading cause of misaligned panels and callback calls.
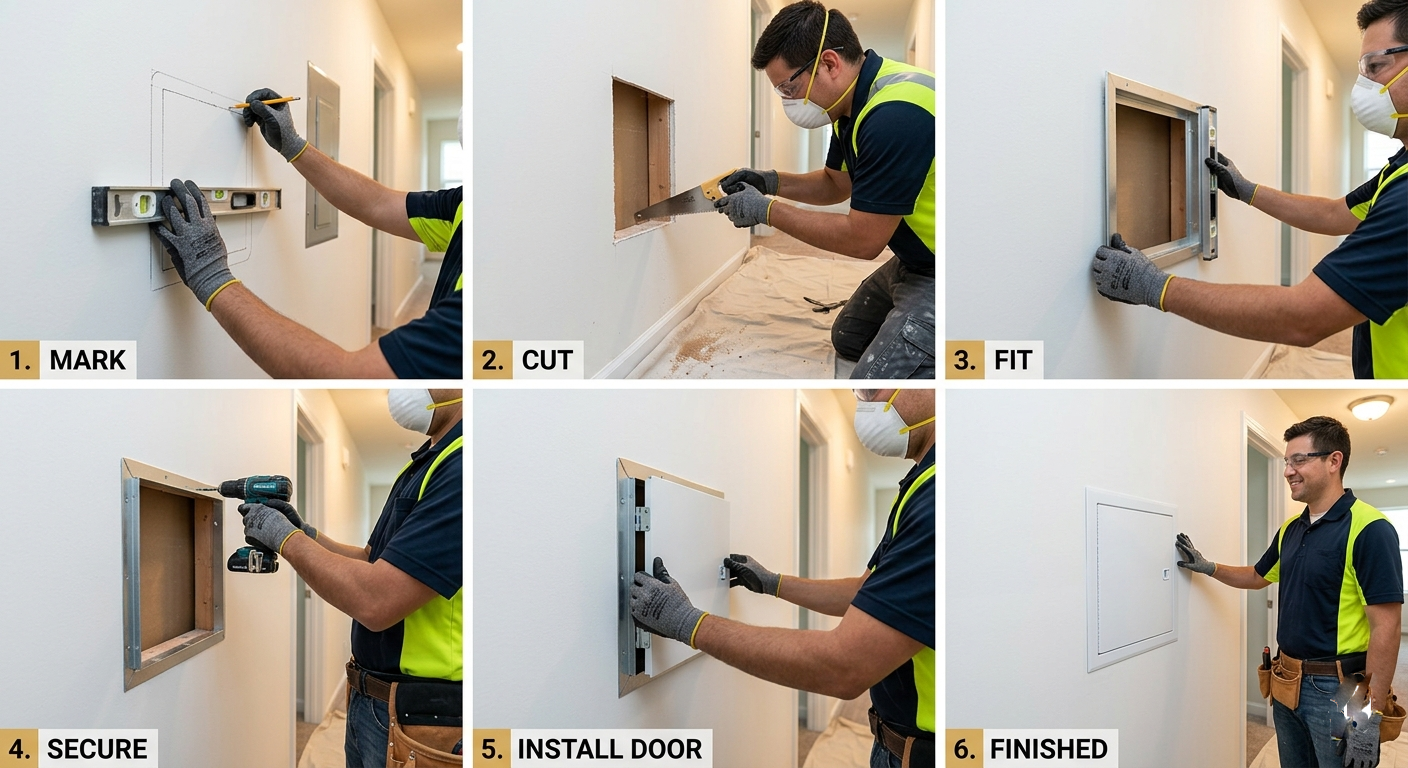
Use a stud finder and a non-contact voltage tester to confirm no live wires, pipes, or ducts run through the planned cut zone. Mark the center of the target component, then lay out the rough opening dimensions with a pencil and framing square. Double-check measurements twice before cutting. Cutting into live wiring or copper supply lines is dangerous and expensive.
If the opening falls within an existing stud bay, cut out the drywall in that bay first (you will replace it with the panel). Install horizontal blocking—typically 2×4 lumber—at the top and bottom of the intended opening, nailed or screwed between the flanking studs. If the panel spans more than one stud bay, add a king stud and trimmer stud on each side and install doubled headers at top and bottom. All framing members must be flush with the face of the existing studs so the panel frame sits flat.
Score the drywall along your layout lines with a utility knife, then cut through with a jab saw or oscillating tool. Keep the blade tight against the framing to produce a clean, supported edge. Remove the cut piece. If the drywall edge along the sides of the opening is unsupported (no stud behind it), add a backer block of 2×4 to give the panel frame something to fasten into.
Slide the panel frame into the opening. For bead-flange panels, the flange will overlap the face of the drywall by ¾ inch on all sides. Check the frame for level and plumb—adjust shims if needed. Fasten the frame through its pre-drilled holes into the framing using the provided screws or 1-5/8-inch drywall screws at 8-inch intervals maximum. Do not overtighten screws on plastic frames, as this will bow the frame and prevent the door from closing flush.
Apply a thin coat of all-purpose joint compound over the bead flange, embedding mesh tape at each corner. Feather the compound 6–8 inches beyond the flange edge for an invisible transition. Apply a second coat after the first dries completely (typically 24 hours). Lightly sand with 120-grit before priming. Three thin coats always produce a flatter result than one thick coat.
Prime the finished drywall and flange area with a PVA drywall primer before painting. For panels with a drywall insert door, cut a piece of ½-inch drywall to fit the door frame recess, secure it with the provided clips or adhesive, and finish the face of the insert to match the wall. Hang the door on its hinges or set it into its frame, and test the latch for smooth operation. The door face should sit within 1/16 inch of the surrounding wall surface—any more gap is visible and indicates a framing or installation error.
Installing a fire-rated access panel involves extra steps beyond standard installation. Failing to follow UL installation instructions exactly voids the listing and the fire rating of the entire wall assembly.
Most jurisdictions follow IBC Section 716 for fire-rated access panels. Always confirm with the Authority Having Jurisdiction (AHJ) before installing in a rated assembly.
| Mistake | Consequence | Prevention |
|---|---|---|
| Rough opening cut too large | Panel frame has no support; flexes and fails | Measure panel RO spec precisely; add blocking if overcut |
| Frame installed out of plumb | Door binds or gaps on one side | Check level/plumb before every screw; shim as needed |
| Using non-rated panel in fire-rated wall | Code violation; failed inspection | Identify wall assembly rating before ordering panel |
| Overtightening plastic frame screws | Frame bows; door won't close flat | Hand-tighten until snug; no power-driving into plastic |
| Finishing compound over moving parts | Hinge or latch painted shut | Mask door gap with painter's tape during finishing |
| Inadequate blocking for ceiling panels | Panel sags; fasteners pull out of drywall | All four sides of ceiling opening must bear on framing |
Both materials work well in the right application. The decision comes down to load, environment, and finish quality requirements.
Steel frames are the professional standard for commercial, fire-rated, and high-traffic applications. 16-gauge cold-rolled steel handles incidental impacts without flexing. Galvanized or powder-coated finishes resist corrosion in damp environments such as behind shower walls or in mechanical rooms. Metal frames also accept drywall anchors more reliably if framing misalignment requires an anchor point.
ABS plastic panels are lighter, less expensive, and will not rust—making them suitable for high-humidity residential applications like bathrooms and laundry rooms. They are not suitable for fire-rated assemblies or ceilings larger than 12×12 inches due to lower structural rigidity. Plastic frames are easier for one-person installation because they weigh significantly less than equivalent steel panels.
Ceiling installations follow the same basic steps as wall panels but introduce unique challenges: gravity works against you, and the panel must support its own weight reliably over decades.
A properly installed drywall access panel requires minimal maintenance, but a quick annual check prevents small issues from becoming expensive problems.
| Application | Recommended Panel Type | Key Specification |
|---|---|---|
| Residential bathroom plumbing | Bead-flange drywall inlay or ABS flush panel | Minimum 12×12"; moisture-resistant frame |
| Electrical junction box (residential) | Bead-flange or flush panel | Minimum 14×14"; NEC 314.29 compliant |
| Fire-rated corridor wall (commercial) | UL-listed fire-rated steel panel | Match wall assembly hourly rating; 20-gauge min. |
| Exterior wall / attic hatch | Insulated access panel or hatch | R-10 minimum; continuous gasket seal |
| Public-access utility area | Locking steel panel | Key-cylinder or padlock hasp; 16-gauge min. |
| Veneer plaster wall | Plaster-stop (mud-in) panel | Wide-flange frame; compatible with plaster system |
| Industrial mechanical room | Removable panel with clip frame | Full-removal capability; heavy-gauge steel |
Contact Us
SHUNSHI provides a range of technical support services to ensure that customers are able to properly select, install and maintain these products.
Products
Access Panels GuideContact
Tel: 86-15988108762
86-572-8298792
Fax: 86-572-8298792
E-mail: [email protected]
No.281 Mingzhu Main Road, Leidian Town, Deqing, Huzhou, Zhejiang, China, 313219
 English
 Español
 عربى
عربى